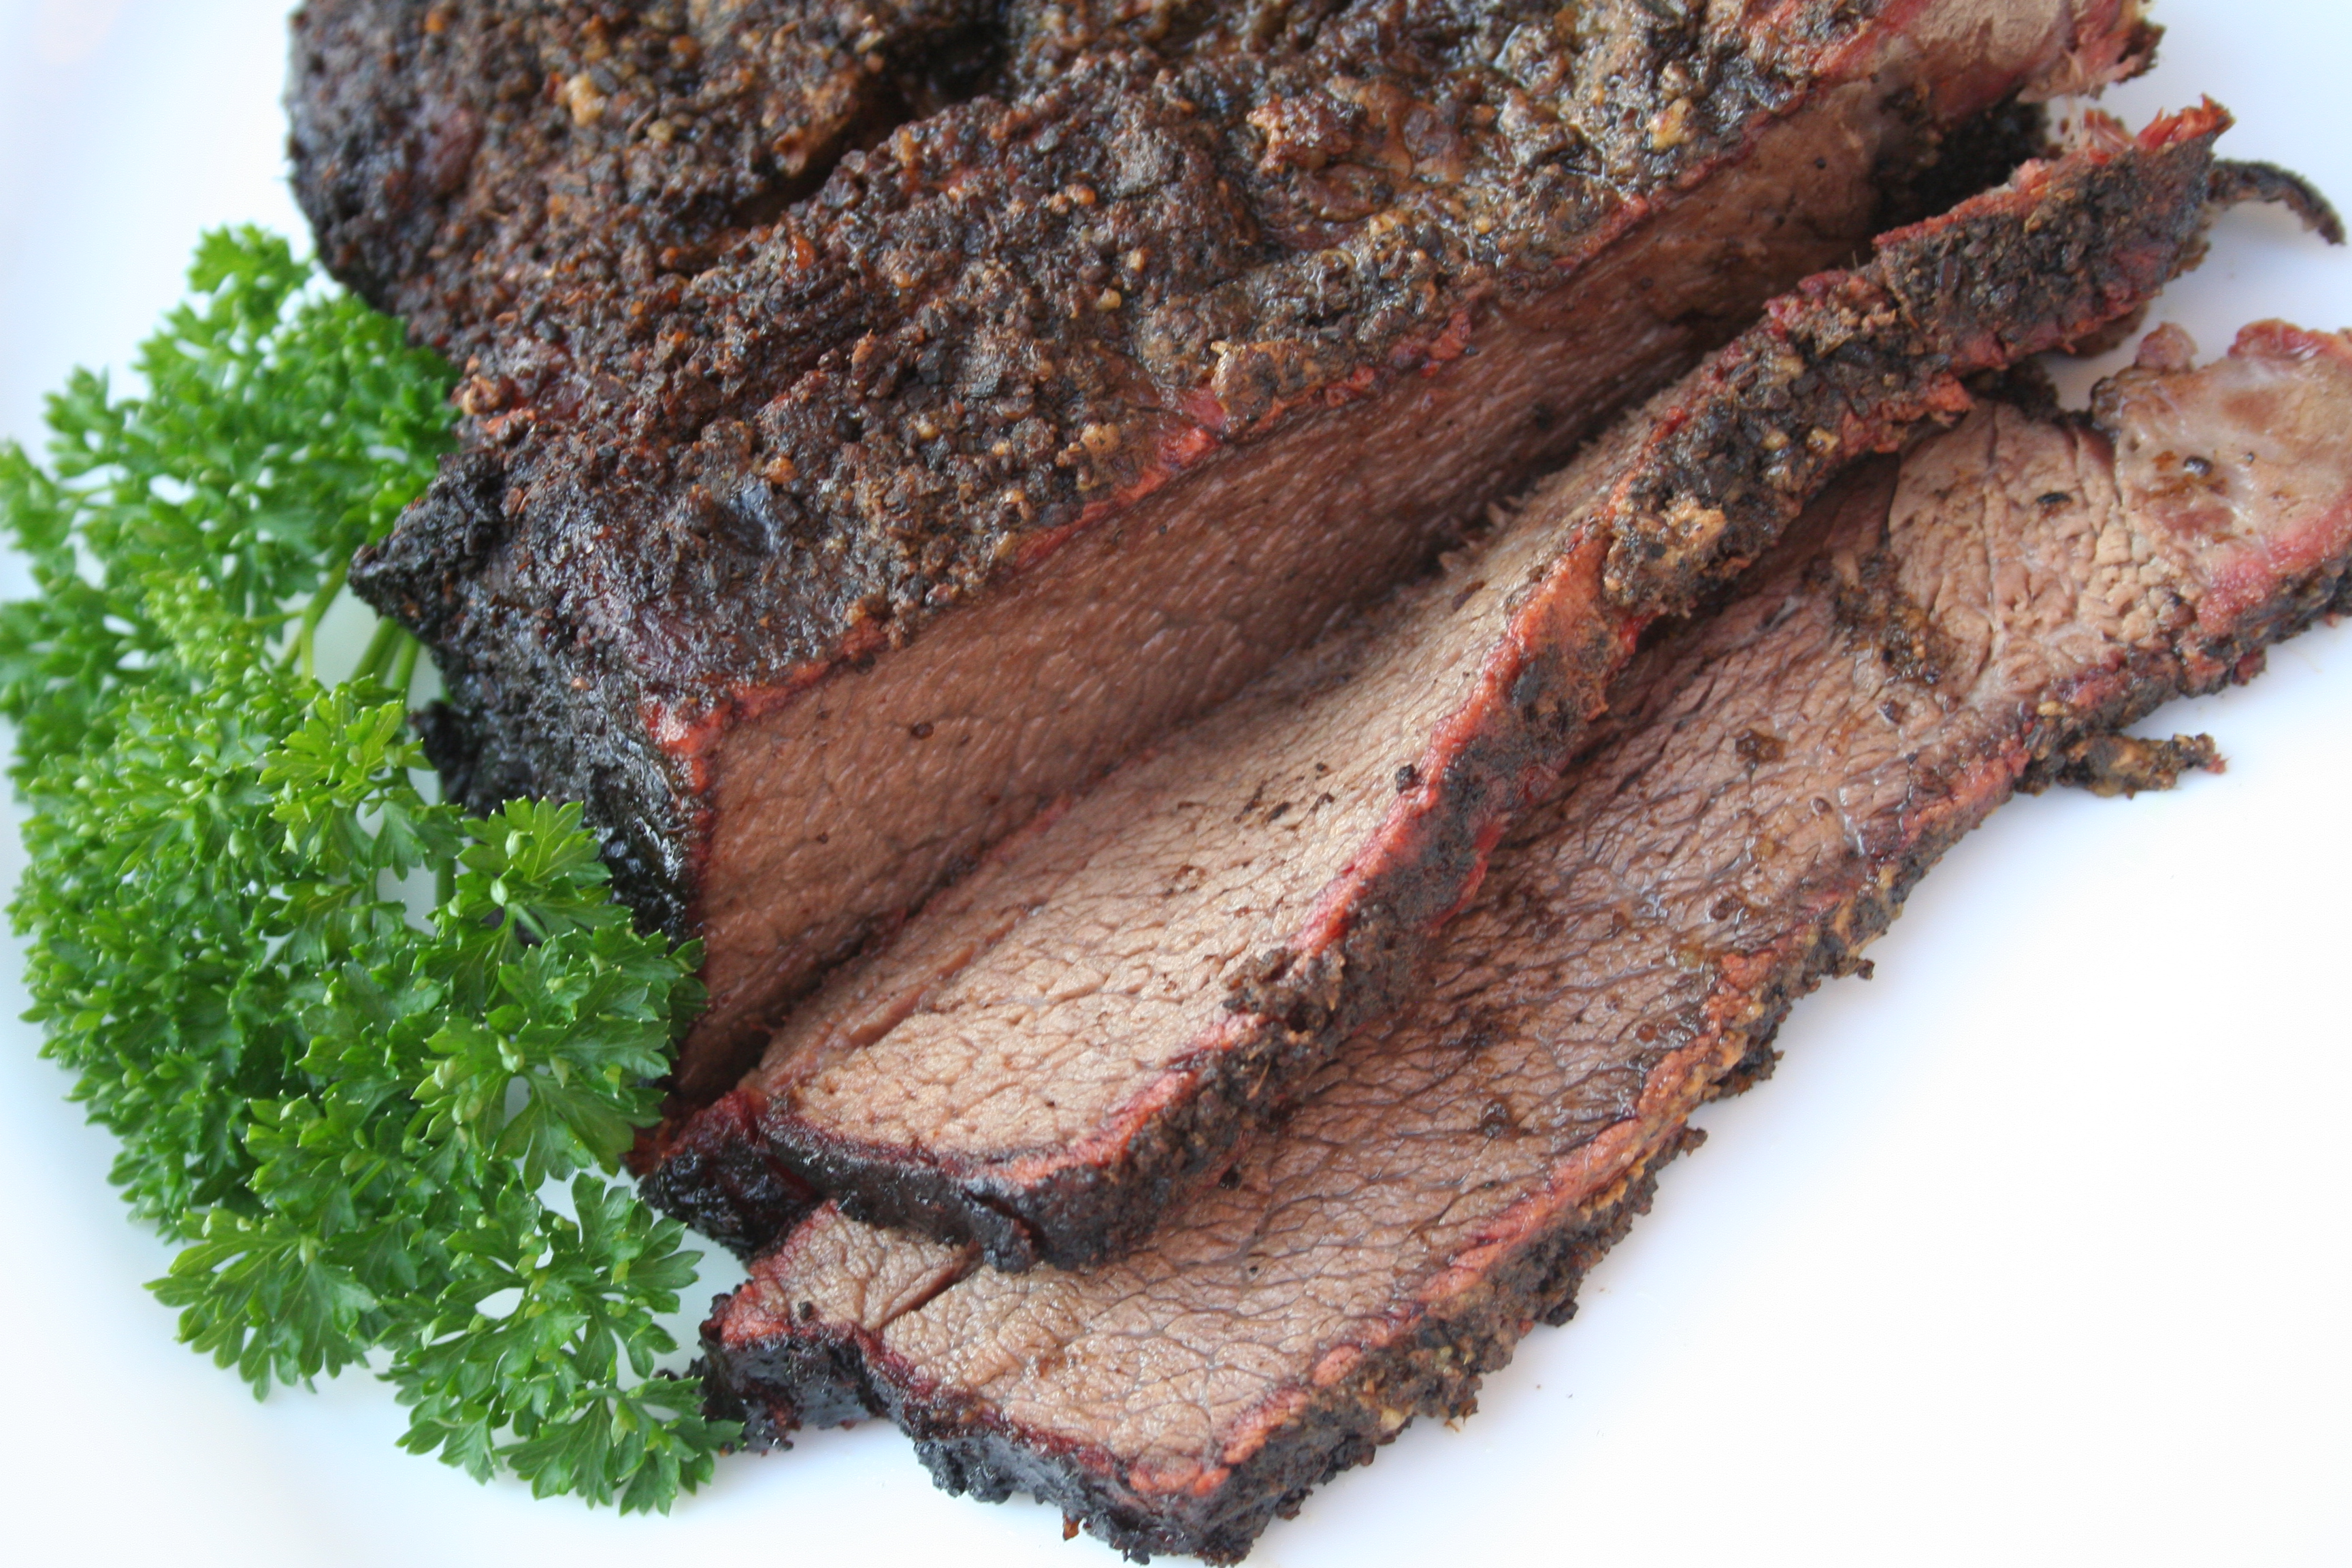
Well I have been holding onto this one for a while, a while back I got some books from the library and one of them featured a Fennel Coriander Rub, which while unique I thought sounded incredible to have on a beef roast or better yet a beef brisket.  Well I was a little unsure so I went with a chuck roast, instead of a whole brisket.  It would be horrible to make a whole brisket that tasted horrible.

Fennel Coriander Rubbed Beef Chuck Roast

Yesterday on the way home I picked up my chuck roast, the selection wasn’t very good so I got a smaller one, about 3 pounds.  Then it was time for the fennel, I had gotten a bag full of fennel heads from my dad so all the seeds needed to be pulled off the heads, this might be alright a tablespoon or two at a time but for a half cup it was a lot of work.  Anyways I rubbed it last night and threw it in the fridge over night and then it was onto the smoker this morning.  I smoked it at 225°F for about 5 hours to about 160°F, basting with apple juice and Worcestershire through the cook about every half hour.  Then I foiled the meat and stuck it back in the heat until the meat reached 200°F.  Then I pulled it and let it rest under a couple of towels for about an hour.

Then we sliced it and ate it with some garlic and rosemary mashed red skin potatoes they are quickly becoming a staple.  But back to the roast, it was cooked to perfection, it was juicy and tender and it had a great smoke ring.  But it wasn’t as good as I had thought it would be.  I didn’t think it was bad but the fennel really comes through, which if fine if you really like fennel (licorice).

Ingredients
1/2 c fennel seeds
1 1/2 tbsp whole coriander
1 tbsp black peppercorns
1 1/2 tbsp kosher salt
2 tsp granulated orange peel

Instructions
Preheat a heavy skillet over medium heat (cast iron if always good).  Once heated add fennel seeds, coriander and peppercorns to the skillet.  Keep them moving by swirling them in the pan, they burn quick.   Cook the seeds until they turn light brown and become fragrant.  Your nose is your guide in this one.  Once they are done pull the skillet off the heat add the salt and mix it in well.  Once the mixture is completely cooled.  Pour mixture and orange peel into a spice (coffee) grinder and grind to a fine powder.

Now for the verdict the meat was good and the rub was alright.  It was very fennelish, which depending on your perspective could be a bad thing.  I really enjoyed it but my wife was not a fan.  She said it tasted too much like licorice.  So would I make it again, I am not sure I might try it on something else maybe lightly on some pork or lightly on some fish even.

Tagged with: , , , , , , ,

The chicken we had for dinner tonight was good, it tasted like the Teriyaki Chicken you would expect, but the sauce on its own was outstanding.  I made the sauce at lunch today and had to deal with the memories the sweet and savory flavor of it all afternoon.  It was most tasty.

Grilled Teriyaki Chicken

So the grilled part was easy throw it on the grill directly over some hot coals just long enough to get sear marks on both sides and then it was off to the other side of the grill to slow cook them to perfection.

The Teriyaki Sauce from scratch was almost as easy as grilling the chicken breasts, once the sauce was made I marinated the chicken in it for a couple of hours before grilling.

Ingredients
1/3 c reduced sodium soy sauce
1/3 c sugar
1/3 c cold water
1 tbsp garlic powder
2 tsp corn starch
1 tsp grated ginger
1/2 tsp red pepper flakes

Instructions
Combine all ingredients except water and corn starch in a small sauce pan.  Combine corn starch and water separately from the rest of the ingredients.  Mix both together in the sauce pan and heat over medium heat until it reaches a boil.   Remove from heat and use immediately or refrigerate and save for later.

This stuff is good, its really good.  I am thinking some Teriyaki Jerky might make an appearance this weekend.

Tagged with: , , , , ,

Growing up I liked to eat waffles, we had them every Sunday morning it was tradition in our home.  Dad would get up and make waffles every Sunday we would pile them high with way too much brown sugar or drench them in more than enough Maple Syrup, but they were always good.  Well when my wife and I got married we got a waffle maker and I am ashamed to say that until this past weekend I had not touched it, one year had elapsed and we had not so much as made a single waffle.  Well that changed and we will be making waffles more than once in the following years.

Being that I knew absolutely nothing about making any kind of waffle that did not originate in box (I am ashamed to say), I was pleasantly surprised when one day a tweet from @thefoodgeek about waffles from scratch broke my concentration.  Now making waffles is not my specialty, so the recipe looked really simple and we gave it a whirl.

Waffle on a plate

It was almost like making waffles from a box except you have to plan ahead a little the night before and start the batter, then in the morning, add the eggs and cook them like you would cook a box waffle.  It was simple and they were really quite tasty.

Ingredients
2 c flour
2 c milk
8 tbsp butter, melted and cooled (we used margarine, blasted allergies)
1/2 tsp yeast
1 tbsp sugar
1/2 tsp salt
1 tsp vanilla ( the original recipe called for 1/2 tsp)
1/2 tsp cinnamon ( to original recipe called for 1 tsp, but it seemed like to much for my palette)
2 eggs

Instructions
The night before mix dry ingredients.  Stir in milk, butter and vanilla until it is mixed well.  Cover and let it sit out overnight.  The next morning separate the egg whites from yolks, mix the yolks into the batter.  Whip the whites and fold them into the batter.  Pour the batter on a waffle iron and enjoy when cooked.

Adapted from A Year from Scratch – Simply Amazing Waffles

I didn’t change much in the original recipe but I did increase the vanilla and decrease the cinnamon to match my tastes.  It is probably pretty incredible the way it is written up on A Year From Scratch, but I really like my vanilla.  There are some other great recipes and cooking information over at A Year From Scratch that are worth reading through, make sure you check them out.

One last note, these waffles freeze incredibly well, just let them cool throw them in a zip lock and freeze.  Then pull them out and toast like a toaster waffle, they make a pretty wicked toaster waffle.

Tagged with: , , ,

So many people have raved about apple cider brined pork chops and smoked pork chops that I had to see what all the fuss was about.  Well now I know, they didn’t knock my socks off but they were certainly good enough to make again and when paired with my made from scratch bbq sauce, it was a match made in heaven.  They were delectable.

Apple Cider Brined Smoked Pork Chops

Looks expensive doesn’t it, well it doesn’t have to be.  In addition to being inexpensive, it was crazy easy to make.  All that is involved is an over night soak in the brine detailed below, a quick dusting with any seasoning you want.  I used a little bit of BBQ 3000 just to give it a little more and then a quick (2 hourish) jaunt on the smoker at 225°F with some apple wood.  I cooked them up until the internal temperature was 165°F, pulled them and let them rest for a short while, before cutting into these juicy and mighty tasty pork chops.

Ingredients
4 c apple cider (not juice)
1/4 c brown sugar
1/4 c kosher salt
1 tbsp balsamic vinegar
1 tbsp chile powder
1 c boiling water

Instructions
Mix sugar and salt into boiling water until dissolved.  Cool mixture.  Mix together apple cider, chile powder, vinegar and water mixture.  Place pork chops in a 1 gallon zip lock bag, pour in brine and fill remaining space with cold water.  Refrigerate over night in brine, remove, season and smoke.

Like I said this recipe will be sticking around next time it might not be chops, it might be another cut of meat.  It would also make a great base for some other marinade, just adjust the seasonings.  Please tell me it at least made you hungry to look at.

Tagged with: , , , , , , , ,

With all the hype about no knead bread and no knead pizza dough I decided it was time to take the plunge and give it a whirl.  Last night I started on the journey to make a homemade pizza with some no knead crust and to through a little twist I decided to cook it in a cast iron skillet in the oven.  Well it turned out to be incredible and I am glad I made enough dough to make a couple more.

No Knead Pizza

There was a slight bit of kneading required in spite of the name but the dough was awesome, but it needs to be planned for and made well in advance.

Ingredients
3 c + extra flour
1 1/2 c warm water
1/4 c + extra olive oil
1 1/4 tsp kosher salt
1 tsp sugar
1/4 tsp yeast

Instructions
Mix together dry ingredients thoroughly, then mix in water and olive oil until it is mixed evenly, it will be very wet, like sticky and not dough like wet.  Drizzle olive oil over the surface of the dough, cover bowl with plastic wrap and let set for 12-24 hours.  Once dough has raised.  Turn oven on the highest temperature possible (500°F in my case) and put cast iron skillet in the oven until it is heated well.  Punch down dough flip out onto a floured surface and divide into small balls and make individual rounds of dough, for pizza.  I made three.  Roll or stretch out the dough into thin crusts.

Have your toppings, sauce and cheese ready.  Lightly oil the skillet and then place the crust in the skillet.  Quickly put sauce, toppings and cheese on the crust.  Bake in skillet in oven until pizza is done.  Mine took about 5 minutes.

Even though you have a little more planning to do than with normal this crust is well worth the effort and advanced preparation.  I am glad I have two crusts left, I can’t wait to make it again.  This time it was just pepperoni, next time it will be much more elaborate.

Tagged with: , , , ,