Ribs, Again!  This time with more style.  Last time I used two rubs out of a bottle and had good ribs come up but the rubs was not complimentary.  The ribs were good but they were not as good as they should have been.  This time, I managed a little more success.

Ribs with Garlic and Rosemary Mashed Potatoes

Last night I whipped up perhaps my favorite pulled pork rub, a brown sugar and rosemary rub, using some fresh rosemary, from the plant to the rub, it doesn’t get much fresher than that.  From there I lightly rubbed the ribs with Dijon mustard and then the rub and then it was into the fridge to rest overnight in bask in that magnificent rub.

Then in the morning it was onto the smoker with some apple wood and some hickory at 225°F for 3 hours, I did spritz the ribs a couple of times as the skin dried out with apple juice during this time.  Then it was into a double layer of foil for 2 hours, then back onto the grate in the smoke with no foil until they reached 172°F in the thickest part of the rib.  I brushed them lightly with BBQ sauce during this time as well.  Then it was off the smoker and back into some foil, a wrapped in a couple towels and then into a cooler for about 30 minutes of rest to allow the juices to redistribute and the flavor to mature.

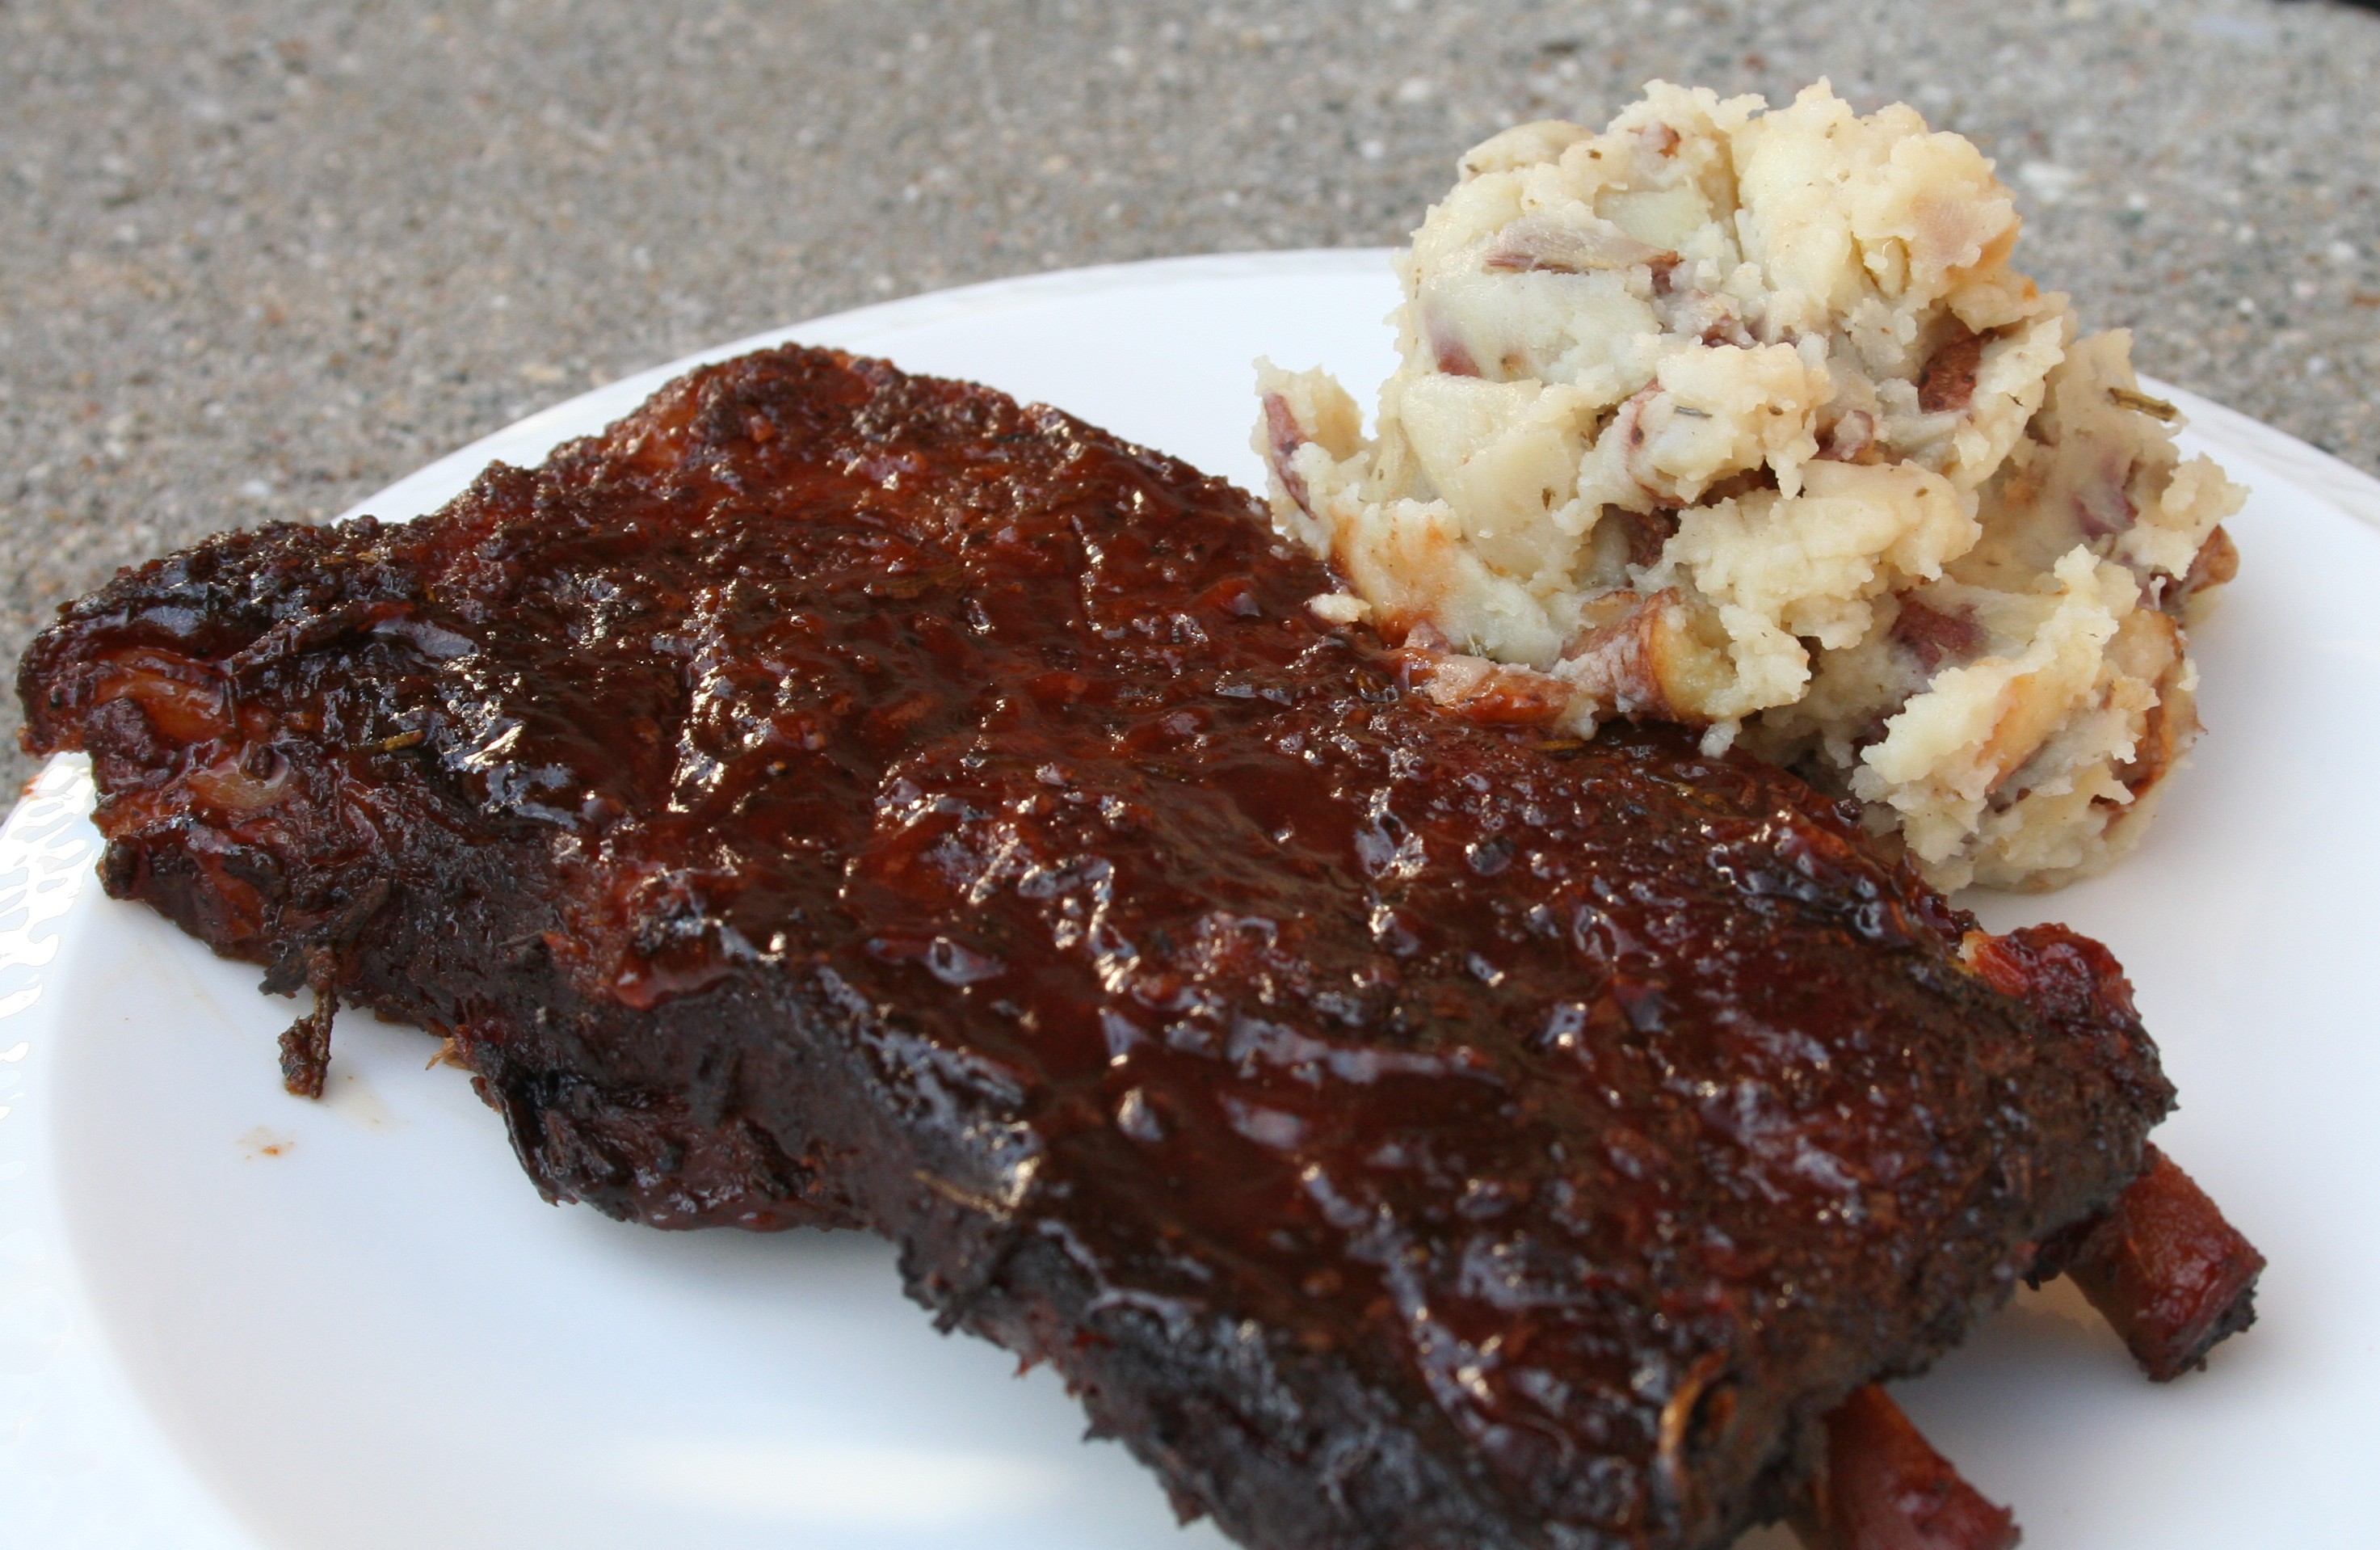
Then it was time to eat them.  They were better than the last rack of ribs I smoked, either half of them.  They were sweet and had a nice bark on them were fall off the bone tender.  The rosemary complimented the sweet and the delicate flavor of the pork ribs, they were perhaps the best ribs I have ever had.

With one exception it looks like I have found my rib recipe for at least the immediate future.  My wife smelled the cumin in the rub when I was making it and she was able to taste a hint of it in the finished product, she wanted less cumin next time.  I thought all was well the way it was.

Either way they were great, an appropriate use of such a fine piece of meat and they went well with some garlic and rosemary mashed red skin potatoes.

Tagged with: , , , , , , ,

Ribs, everybody wants to make some and a lot of people are not sure how.  Well like most meat low and slow will give you a juicy and fall off the bone tender result.  But with ribs there is something special that needs to happen.  I like typically like to stick with larger cuts of meat but no man could claim to be even a novice of the BBQ without having ribs tucked away firmly in his belt.

Rack of ribs

Like most chunks of meat I smoke the ribs started out the night before with a trimming, which I historically do a less than professional job at.  From there I wash the ribs and pat them dry with paper towels and then rub them.  Typically rubbing is a two part process.  The first is to coat them in mustard or some other liquid to help the rub stick and the second is the rub them with your rub.  How much is up to you, ribs have a delicacy to them that is easily over powered with too much rub.  Once this is all done is into the fridge in a sealed container to think about what they have done.

Freshly rubbed spare ribs

The meat (ribs) in the picture above were rubbed with two different rubs.  After a nights worth of sitting in the rub or a couple hours if that is all that is available I get the smoker ready.  I boil some water in my kettle for my water pan to speed up the preheating process and get my wood for the day ready.  Once the smoker has reached that magical temperature of 225°F it is ready for some meat.  So I lube my grate with some oil, its a habit and then throw the meat on and let the smoke start rolling.

Ribs just on the smoker

When smoking ribs I use the 3-2-1 Rib method, which is not my invention but seems to work quite well and is easy to remember.  The first stage is to smoke the ribs for about 3 hours.  The time is not nearly as important as is the appearance at this point.  Once the meat begins to pull away from the bone and has pulled back about a 1/4 inch it is time to move onto step two.

Ribs at the end of stage 3

Once your ribs are looking like these it is time to move on to step two.  Stage two is kinda hard to swallow at first, I mean I just wanna continue to flood my ribs with smokey flavor but its time to pull back for a few.  In stage two its all about time, take the ribs off the smoker and wrap them in foil with a little apple juice.  I am not sure how much apple juice I use it depends on the meat and what looks good.  You could certainly substitute some other liquid here the goal is just to provide the ribs with some moisture while they are in the foil.  Throw the ribs wrapped in foil back on the smoker for two hours and let the magic happen.  During this time the ribs are soaking up the juice and getting their fall of the bone tender status.  There is no need to supply smoke during this period.

Ribs after stage 2

After two house in stage two remove the ribs from the foil and place them back on the smoker grate and get the smoke rolling again.  It might be time to check that water pan too.  The ribs should look like those above at this point, shrinkage has occurred and they looking kinda mushy.  That is where the final stage of the 3-2-1 method comes in smoke them until they reach 172°F in the thickest part of the meat.  This should take an 45 minutes to an hour.  If you would like to add BBQ sauce during the last 15 minutes on the smoker is the time to do this.

Ribs cooked to perfection

Once the ribs are done pull them off the smoker and let them rest for 15 minutes on the counter.  During this time the juices will redistribute and you will be glad you waited.  Serve and enjoy.

The 3-2-1 method assumes you are dealing with spare ribs.  If you find yourself with baby back ribs you will be looking at something more like the 2-2-1 method, just be sure to be more attentive to the meat an hour earlier with baby backs.

As with most other pork I prefer to mix apple and hickory for my ribs, gives them an excellent flavor.

Tagged with: , , , , , , , , , , ,

Or a brisket sandwich at least.  Like so many quests in the kitchen and life I began my summer with a goal to smoke a brisket, I am not going to lie I have never smoked a brisket before and I am not had all that much smoked brisket.  But with a bit of patience, alot of hickory and mesquite wood and even more patience, the brisket got done and beyond that it was phenomenal.

Smoked Beef Brisket Sandwich

The brisket was good on its own and even better between a couple of slices of bread.  It was juicy and flavor filled and fall apart tender.  But enough bragging here is how it came about.

Tuesday I headed over to a local butcher after work and picked up a 9lb chunk of brisket with a healthy fat cap.  After a little waffling I decided to the only cook half of the brisket and freeze the other half until I was sure I had my brisket technique down, I ended up cooking only the flat part of the brisket.  I then proceeded to trim the fat cap down to about a quarter inch over the entire brisket and scored the fat cap in about a 1 inch grid.

Then it was rub time, I had planned on making my own rub but decided to save that until later, so check back.  I used a Cookshack Brisket Rub I picked up on my last trip to Cabelas, it was MSG free and looked tasty (can’t really smell it in the store) and  I was actually very happy with the rub and will likely use it again.  I digress, I rubbed the meat with a healthy layer of plain boring yellow mustard and then rubbed the brisket with the brisket rub.  From there it was into a sealed container and into the fridge for a night of rest.

Early the next morning before the sun had even decided to rise, I was out tooling around in the garage getting the smoker fired up, water pan filled and the smoker pre-heated to that prime BBQ temperature of 225°F.  Once the smoker was ready to go I added a healthy dose of hickory and mesquite and threw the brisket on the top rack, fat cap up and gave it one last dusting of the rub.

Beef Brisket fresh on the Smoker

Then it was time for the patience, checking in occasionally to make sure it was still smoking and the temperature was still good. One hour, two, three, four and then it was time to spritz with apple juice every hour on the hour.  At hour four I shoved my remove electric thermometer into the middle of the brisket to keep track of the progress and got back to waiting.  Around hour five is when it happened at the internal temperature of 151°F, the dreaded stall and it sat there for five hours before it budged even a single degree, it was frustrating but that is what the patience is for.

One Cooked up Beef Brisket

Finally after 14 hours on the smoker the brisket was done, it reached an internal temperature of 200°F and it was pulled and allowed to rest for about 2 hours.  Then it was time to slice and pull, this was magical.  Upon slicing into the brisket I picked up one half only to have it fall apart in my hands, pulling was never more easy.

Sliced Beef Brisket

Then it was time to enjoy, I ate way more than I should have last night and we had a lunch time feast at lunch at work today and the verdict was unanimous, it was excellent.  Can’t wait to smoke another!

Tagged with: , , , ,

So many people have raved about apple cider brined pork chops and smoked pork chops that I had to see what all the fuss was about.  Well now I know, they didn’t knock my socks off but they were certainly good enough to make again and when paired with my made from scratch bbq sauce, it was a match made in heaven.  They were delectable.

Apple Cider Brined Smoked Pork Chops

Looks expensive doesn’t it, well it doesn’t have to be.  In addition to being inexpensive, it was crazy easy to make.  All that is involved is an over night soak in the brine detailed below, a quick dusting with any seasoning you want.  I used a little bit of BBQ 3000 just to give it a little more and then a quick (2 hourish) jaunt on the smoker at 225°F with some apple wood.  I cooked them up until the internal temperature was 165°F, pulled them and let them rest for a short while, before cutting into these juicy and mighty tasty pork chops.

Ingredients
4 c apple cider (not juice)
1/4 c brown sugar
1/4 c kosher salt
1 tbsp balsamic vinegar
1 tbsp chile powder
1 c boiling water

Instructions
Mix sugar and salt into boiling water until dissolved.  Cool mixture.  Mix together apple cider, chile powder, vinegar and water mixture.  Place pork chops in a 1 gallon zip lock bag, pour in brine and fill remaining space with cold water.  Refrigerate over night in brine, remove, season and smoke.

Like I said this recipe will be sticking around next time it might not be chops, it might be another cut of meat.  It would also make a great base for some other marinade, just adjust the seasonings.  Please tell me it at least made you hungry to look at.

Tagged with: , , , , , , , ,

Good BBQ sauce will not rescue a poorly cooked (bad) piece of meat, sure it might add a little moisture but it will still be a bad piece of meat.  With that said, good BBQ sauce will complement a well cooked piece of meat nicely and even make a bad piece of meat desirable, if that sauce is just that good.  Face it no one likes to be seen eating BBQ sauce off a spoon, but this sauce is just that good, you could eat it off a spoon with no meat and other than the looking foolish you would be content.

Apple Smoked BBQ SauceUnlike simply squirting BBQ Sauce out of a bottle this sauce took some work.  It started its journey on the stove in the house, but only long enough to thoroughly mix all the ingredients.  From there it was onto the grill with a huge chunk of hickory to further cook down and get that great smokey flavor that really sets this sauce apart.

BBQ Sauce cooking on the grillOne note about the picture above, even though the chunk of hickory is engulfed in flames in the picture, it did not remain that way once the lid was in place, the rush of oxygen upon removing the lid allowed it to burst into flames.  A chunk of wood in flames like that above will not produce nearly enough adequate smoke to flavor the BBQ sauce properly.

Ingredients
1 15oz can of tomato sauce
2 c apple cider
4 cloves of garlic pressed
2 tbsp red wine vinegar
1 tbsp apple cider vinegar (white vinegar would work as well)
1/4 c brown sugar
1/2 tsp ground black pepper
1 tbsp honey
1/2 tbsp worcestershire sauce
1 tsp chile powder
1 tbsp thickener (cornstarch, flour, etc)

Instructions
Start by combining liquid ingredients in a sauce pan (one safe for the grill) on the stove over medium heat and bringing to a boil.  Stir frequently.  Once the liquid is boiling add in everything else except the thickener, stir and boil until the sauce begins to reduce slightly.  It should smell amazing at this point.  Slowly stir in thickener.  At this point prep the grill (fire up the chimney and get the smoking wood ready) and move the pan to the grill when it is ready and place it on the opposite side of the grill from the heat, add smoking wood and leave to cook uncovered.  Stir the sauce every 15-20 minutes, it should be simmering nicely.  Remove the sauce from the grill when it is thickened to the desired consistency.

It is a tangy sweet BBQ sauce and it is so tasty it has boldness and depth that I have no found in a bottled BBQ sauce and it is pretty simple to make, this is going on the list of favorites.  Before cooking the sauce I did wipe the inside of the pan down with a thin film of canola oil to make cleanup simpler, and it helped, the baked on sauce just came off under the faucet and the scrubbing was minimal.  Just be sure to use a pan you can live with being a slightly different color when you are done on the outside.

Tagged with: , , ,