Chicken Waterer Adventures – Part 1
This is part one, I have no idea when part two, three or four will happen or if they will, but, in my mind this is part one. It is also a lesson learned – a lesson in patience and hopefully not failure, but if it is a lesson in failure, well there will be that.
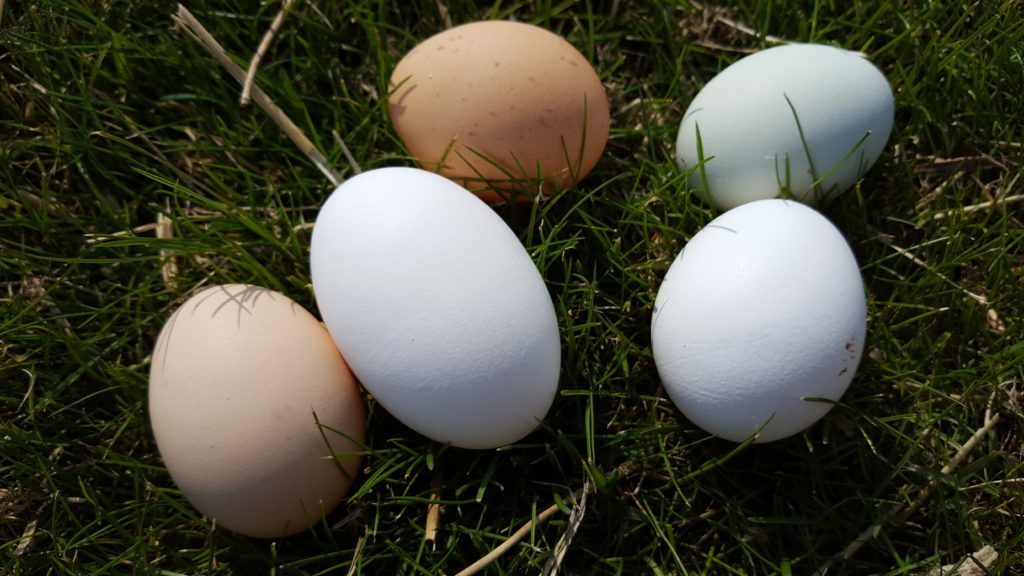
So let me tell you what I know about chickens – they like to poop, they eat a lot, they don’t like drafts, they don’t want to stay in the run unless the door is wide open and you want them to get out and roam around then they like to stay in the run, the can’t seem to keep anything clean, they need water, they don’t like green beans or sweet pepper but like hot peppers and they poop – a lot. Did I mention they poop? This is actually okay with me because at least forty percent of the reason we got them was for their poop, the eggs are a nice bonus but if they can turn scraps and leftover produce into poop to get the compost fired up, that gets me fired up. But to poop they need food…and water.
Food has been the easy part, just keep it out there – it doesn’t freeze and it seems to magically stay cleaner. Water on the other hand has been a chore, it is never clean for longer than five minutes after getting out there and they will not drink if it is dirty – unless its on the ground where they poop then they are all over it – go figure. So our birds have been outside for about a year now – so we are not the chicken experts by any stretch of the imagination, but we have failed a few times.
Our first failure has been keeping the waterer clean and quite honestly I am not positive we have a solution for this one quite yet time will tell. But last summer we tried, we bought some chicken nipples – don’t worry they didn’t come off real chickens, anatomically it just wouldn’t workout. But we bought them, you know the red ones with the stainless steel rod that pokes out? We got those and a couple dollars worth of PVC fittings and like forty bucks worth of brass adapters to make it work. And I don’t know that I can say it worked, I could hook it up to the hose and the chickens had the opportunity to use it; realize I said opportunity – see I have noticed that even when introduced to the water the chickens couldn’t quite figure it out, so the summer went by and we found ourselves replacing the nipples more than we should have as the leaked ALL THE TIME. Anyway the summer went on and we kept filling and cleaning the fount so the chickens were watered and it was clean for five whole minutes, unless it was after dark then it was longer. That was failure number one.
Then fall came and it was really quite mild, we brought the waterer in at night to keep it from freezing and put it out in the morning. This worked until it didn’t – and it didn’t when all of a sudden the cold came and it froze solid – we didn’t realize it got that cold and I came home from work to find a flock of battle weary chickens who had spent the day pecking ice to get some water. This was failure number two, frozen water. So we grabbed a heated pet bowl, a hundred foot extension cord and a bucket to make a suitable watering arrangement for the winter months. We put the bowl on some bricks on the ground, cut four – four inch round holes into the bucket about four inches up and turned it upside down over the bowl to keep at least some of the wind off it and filled er up. But it turns out a heated bowl outside in the cold doesn’t stay very full – I assume it was from being heated but it needed to be filled multiple times daily, which was a pain. So we tried to ease the filling pain by rigging up a special filling watering can – which consisted of a tube on a watering can. Classy huh, sometimes I even filled it outside in just my buck boots, shorts and an old sweatshirt (not one of those fancy ones with a hood either) – we do what we can to keep home values modest around here, sorry neighbors. Even with the special watering can we had to head out there a couple times a day – to collect eggs before they froze solid and make sure the birds had water. So we turned number two into water success number one – we kept the birds watered through the winter, even when the temperatures got down below 0°F.
Failure number three wasn’t measured on the chickens thankfully but our pocket books and egos. One day while out to our local farm supply store we picked up a heated plastic fount, which you can conveniently buy right on Amazon, which will give me a small kickback and help ease the pain of failure. But none the less, this particular waterer may be fantastic, I suspect it is; however I do know you have to flip it over to fill it, which seemed tedious to me. In a moment of absent mindedness I thought, let’s drill a hole in the top and use a rubber cork to plug it. DO NOT DO THIS, EVER! It seems like it will work, until you think about it, this particular waterer seems to use the vacuum the water leaving the tank into the little drinking bowl thing to keep the water that is not needed in the thank. Once you punch a whole, no matter how well drilled and finished into the top – water is not able to be poured into the tank fast enough for it to stay in the tank – not even out garden hose could keep up. Also I could not find a replacement tank so I am stuck with a reminder of my mistake.
Finally spring came and we are back to the fount, which works but its never clean for more than five minutes at a time. In doing some research we discovered cup waterers, which should you choose to you can also buy on Amazon. Now we haven’t been using them long enough to know if they are worth their weight in plastic, it was sort of an impulse buy – we were going to buy one style or another but we were at our local farm supply store and they had them on clearance and we couldn’t resist. But the waterer is so much more than just a couple of water cups, we decided that we wanted on with a tank and an auto fill float so we could be away and not have to worry about water. This past week we bought all the parts from our local rebate happy big box home improvement – which gets a disproportionate amount of my earnings each week – and some from Amazon. Namely from Amazon we bought half inch PVC tees that had one threaded eighth inch side to match the waterer thread, you can buy them on Amazon and I would recommend you do, without hesitation, remember that first nipple water and the insane amount of brass fittings I needed to attach them? Not so when you have the right parts. Worth every penny.
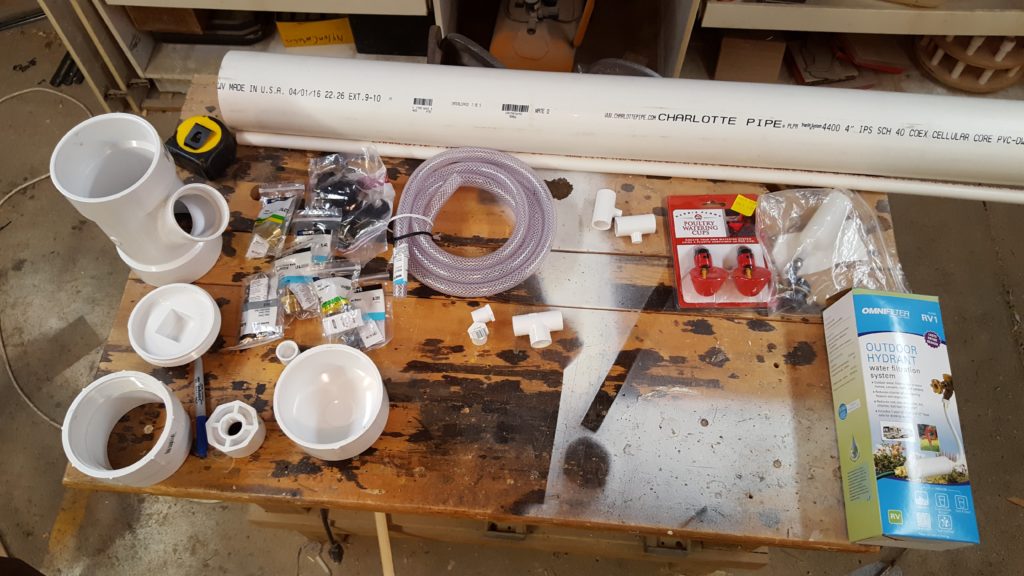
Those are my parts, give or take a couple of trips to the extremely local over priced hardware store where I picked up some pipe tape, which I thought was kinda a lifetime supply when you bought it, guess not.
My parts list consisted roughly of:
- 4″ PVC
- 1/2″ PVC
- 4″ PVC Cap
- 4″ x 2″ PVC Y
- 4″ Female adapter
- 4″ Screw in plug
- 2″ to 3/4″ Threaded adapter
- 1/2″ Tee
- 2 – 1/2″ Plug
- 2 – 1/2″ Tee with threaded 1/8″ side (see Amazon)
- 1/2″ MIP to 1/2″ ID (Barbed) Brass adapter
- 3/4″ MIP to 1/2″ ID (Barbed) Brass adapter
- 2 – Hose clamps
- 1/2″ ID tubing
- Various pipe hangers
- RV Water Filter (more on this below)
- Float mechanism (see Amazon)
- 1/2″ MIP to Garden hose adapter
There is more in the picture but it is in the tool box now, also before I forget the RV water filter is not because our chickens are spoiled, which they are, but because we have really hard water when it doesn’t run through the filter and the softener in the house and I did not want the build up in the waterer. But they are spoiled.
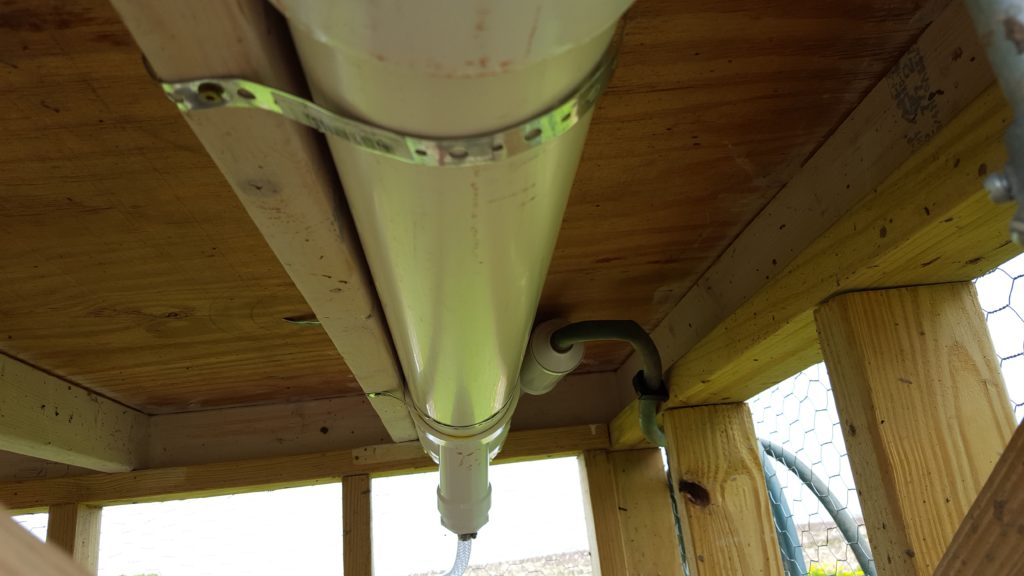
Next came assembly and testing of the waterer, which was built to fit our coop specifically and went together exceptionally well. A lot of pipe dope and pipe tape and a half hour or so and the ‘bazooka’ was done, which I could not resist showing off as such. The ‘bazooka’ or what anyone else might call a reservoir holds about two gallons – which is about what our birds drink in a day, if for some reason we need to disconnect the hose from the waterer we have about a day before we have to worry about it. Anyways this assembly was fairly straightforward, lots of measure twice cut once, etc.
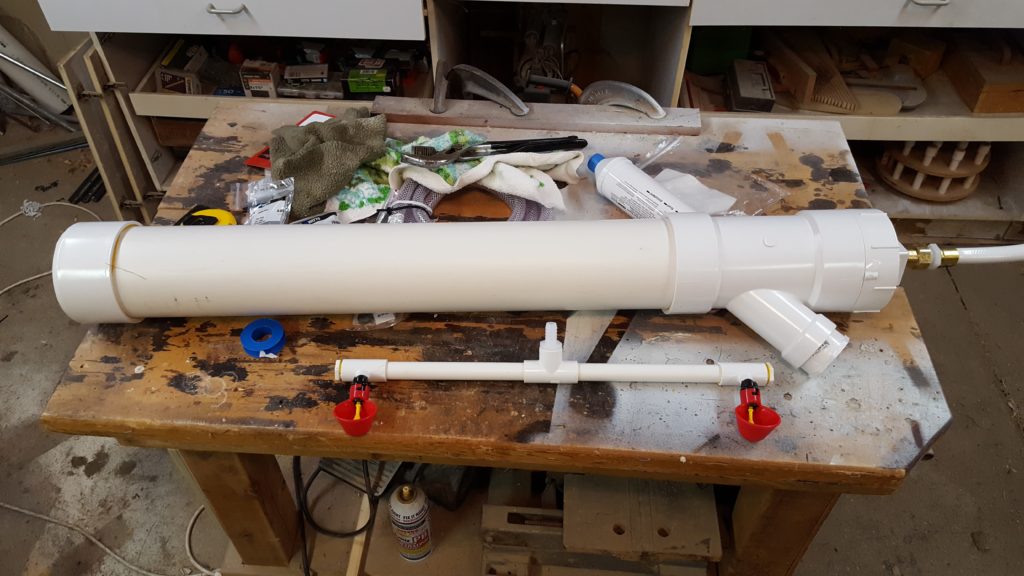
Once it was assembled and tested, forty three minutes later based on the picture time stamps – I never claimed to be a plumber – it was time for install. I took both the ‘bazooka’ and the section with the cups on it, the ‘wand’, and installed them where I felt they were best suited into the coop. I then measured and cut a section of tube to connect them.
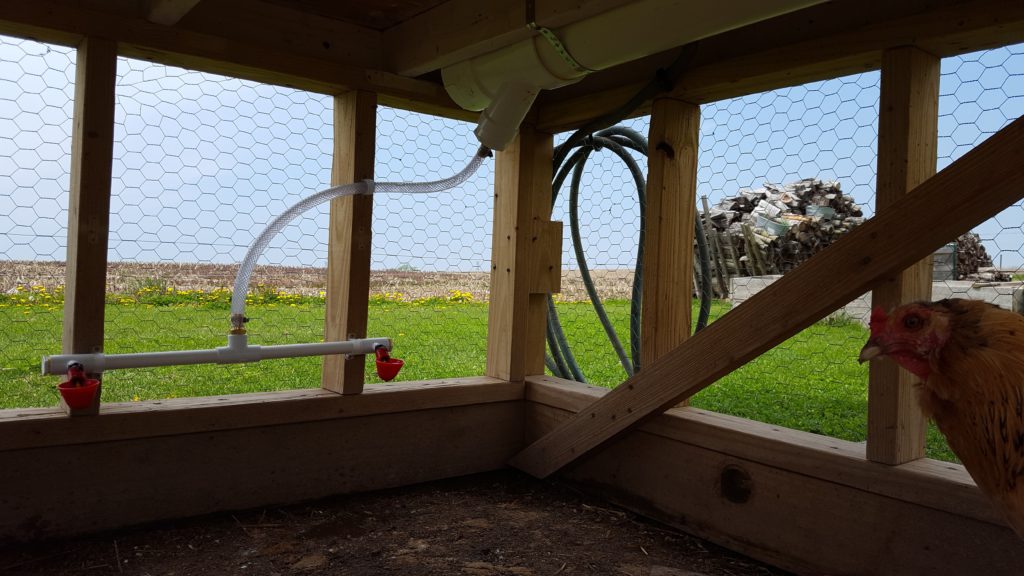
I then connected the hose and water filter and let it fill – note I also flushed the water filter, thank goodness for those instructions – Henrietta says “hi and what is that noise”
Once it was full I crawled under there and introduced the chickens to the waterer, just like you do when they are young, dip their beaks in it – it was so much easier then. I then proceeded to clean and refill their fount and observe.
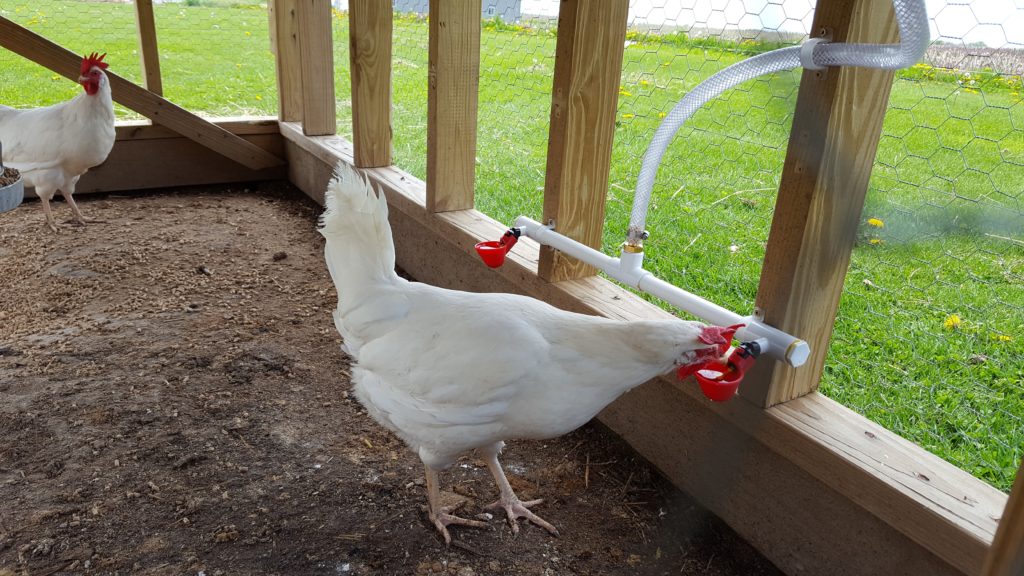
And much to my surprise, a chicken returned to drink from the cup, whoa! Success! But not so fast, one in six is not a good ratio, so I waited a bit longer and not so much. So we left them with both of their waters and went away to celebrate Mother’s day and returned to find both cups empty – well it looks like they might have figured out how to drink from the cups just not how to get them to refill.
Right now I am not sure if this is a success or a failure, it looks nice in pictures and at least one of the chicken appreciates it, but if it doesn’t work for all of them we are back to where we started. One thing I have learned with chickens is that in spite of the best made and executed plans, chickens will do what they want. For instance why did we build three nest boxes if they will only use one when they want to, otherwise, they will just make a nest in the bedding in the far corner of the coop. Hopefully the next post on our waterer is that our chicken waterer was a massive success and we are building a winter version to stand up to the cold. But if not we will keep tinkering with this one until we have something that will work. In the mean time they keep turning whatever we feed them into poop, at least that is consistent.
Really like your products. I am in Kenya Nairobi.
Would like to import the DIY and distribute here. Please help with FOB prices.
Isaac – just ideas here and not products, happy to be in touch, I will circle back with your message on LinkedIn